
Miniature Painting and the great camera “Lie”
I’m always a little squeamish about the word “lie” whenever I feel the need to use it…and those little fingie quotes are definitely doing some heavy lifting this time. Regardless though, miniature photography IS something that seems to be a huge bugbear for hobbyists far and wide, and I have some stuff to say about it.
If you’ve been anywhere near my socials for the last week or so, you’ll be aware that we’re about to launch our first cast mini. It’s a tremendously scary time… I feel immense pressure to “get it right” and make a success of it. In my quest to do so, I’ve been agonising over how I want to present the final photos, for the box art.
Now historically this could have been a true nightmare… I’ve classically been quite ignorant of photography, whilst respectfully admiring it from afar. However, it just so happens that since quitting karate, I’ve been looking for a new hobby that keeps me out of the house…aaaaand you guessed it, since about three months ago, Photography has become the hobby that’s filled that gap.
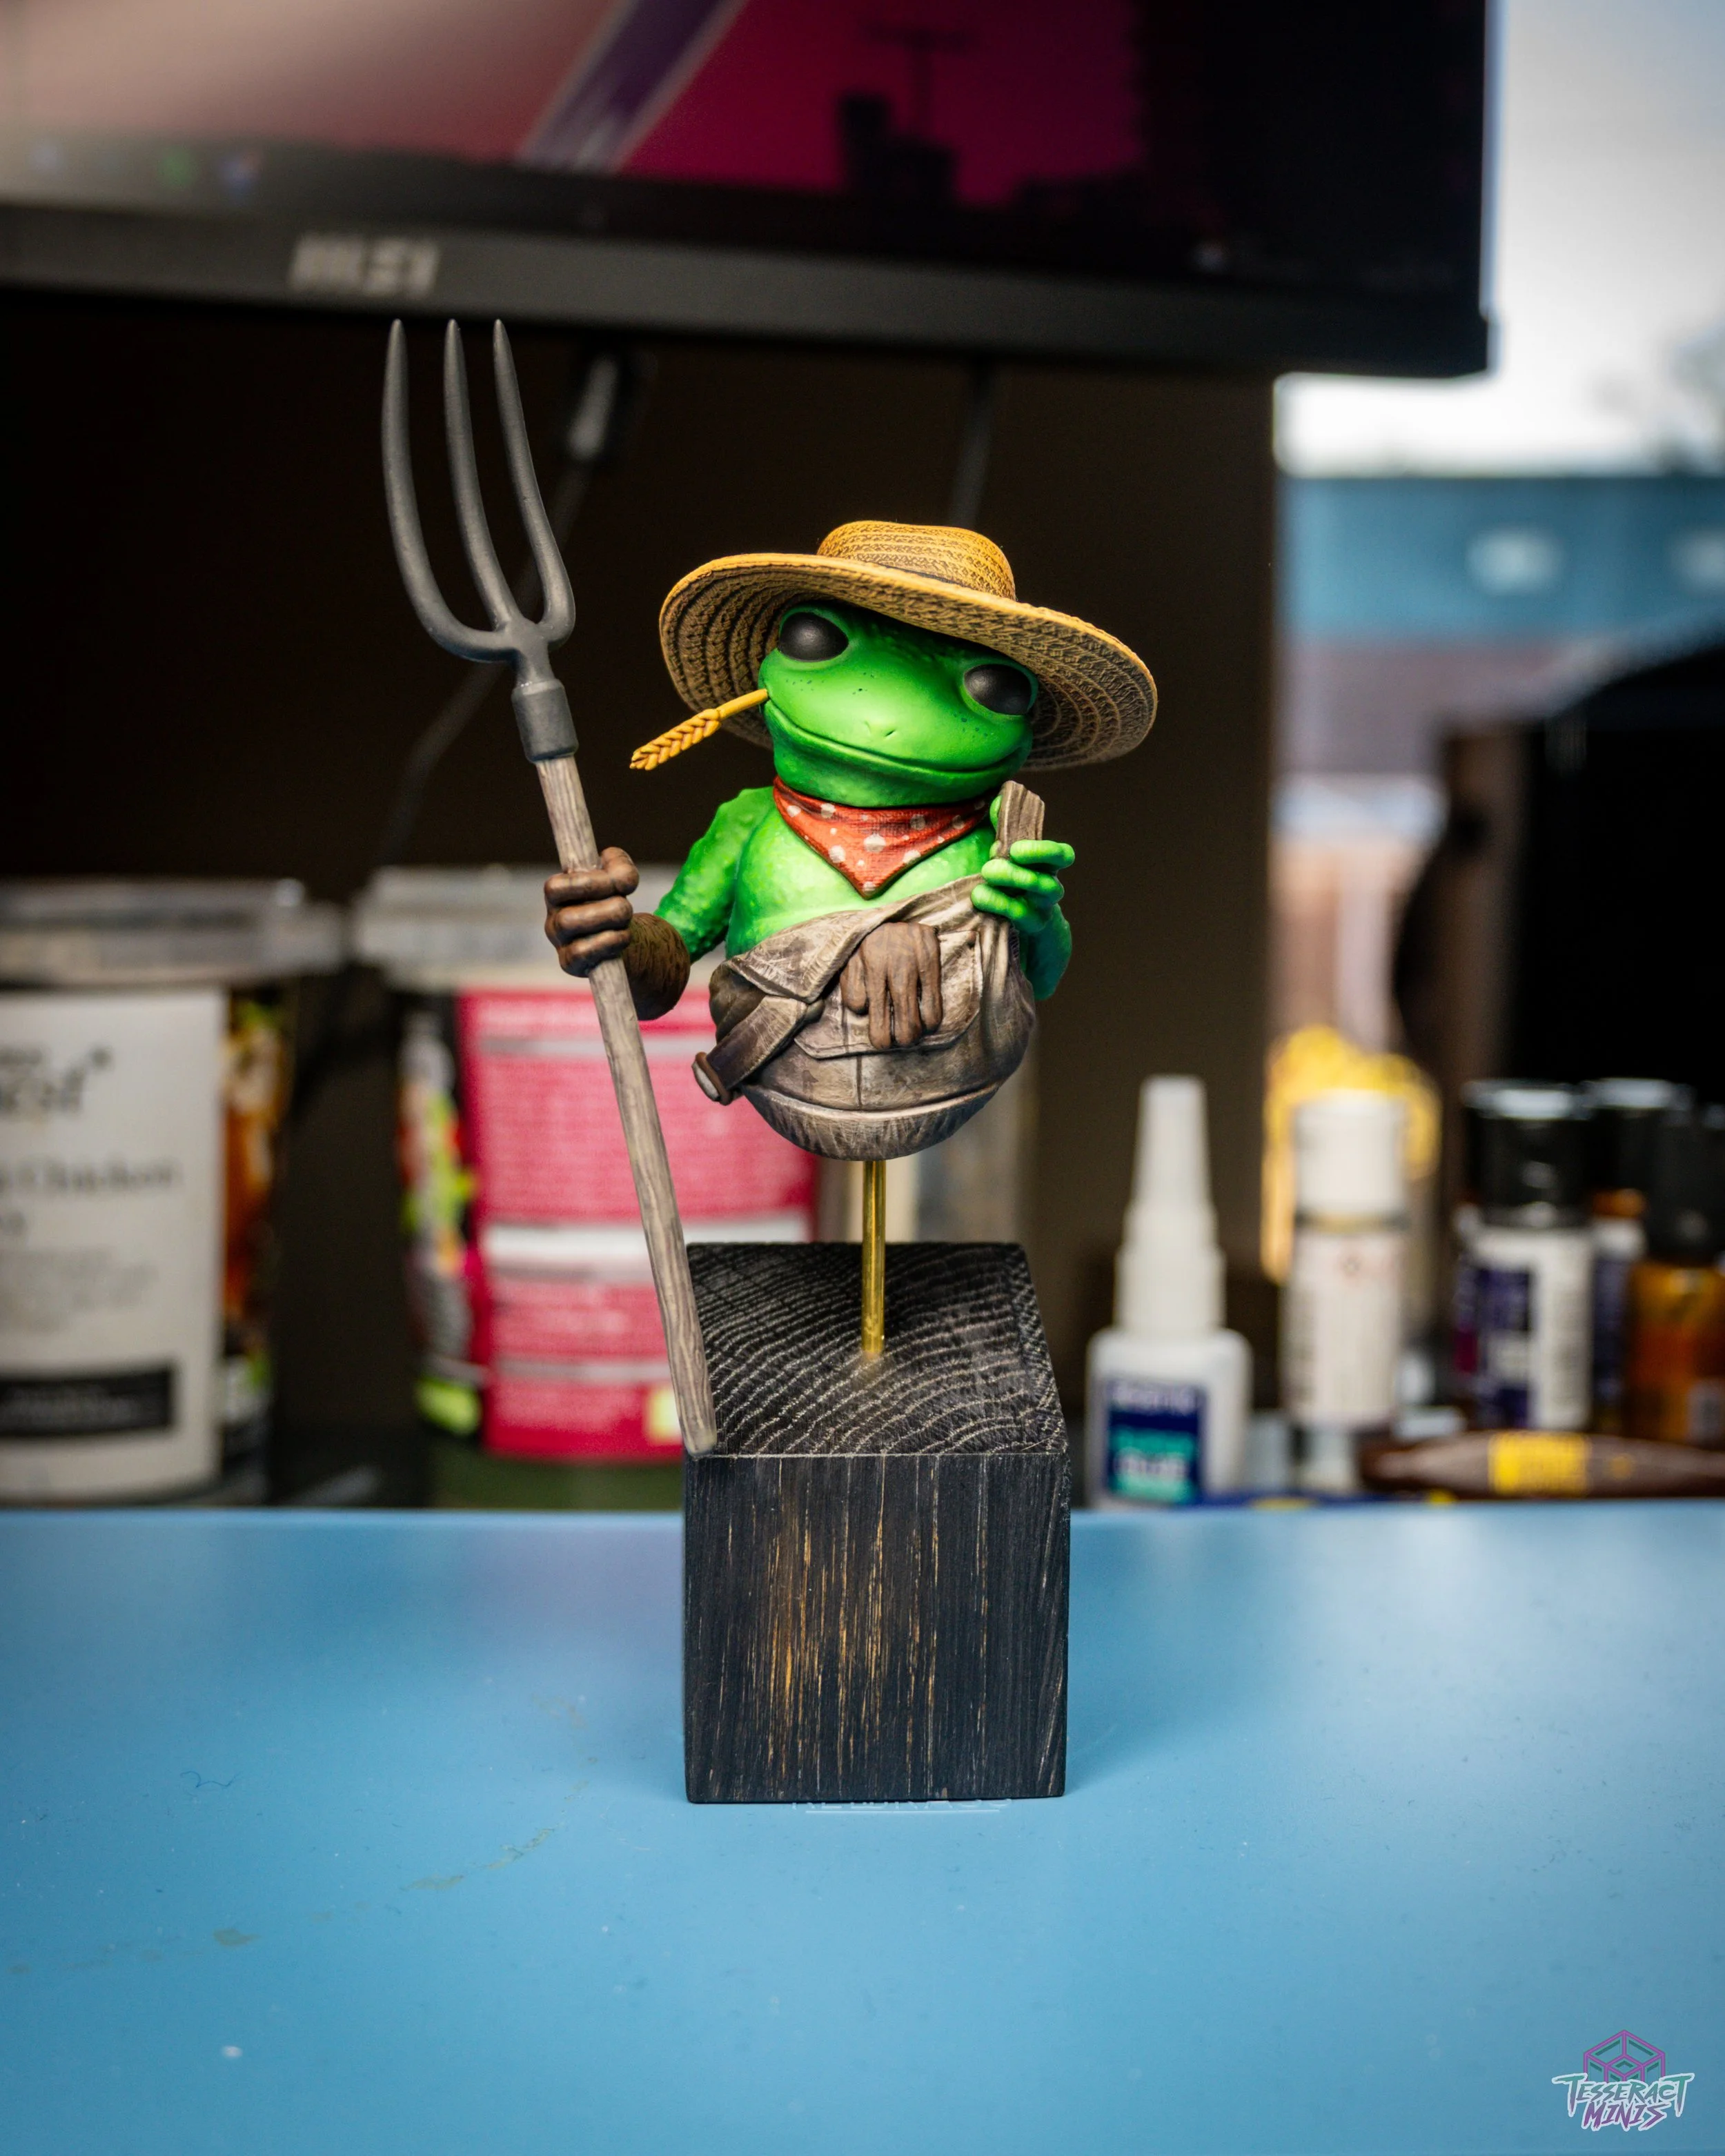
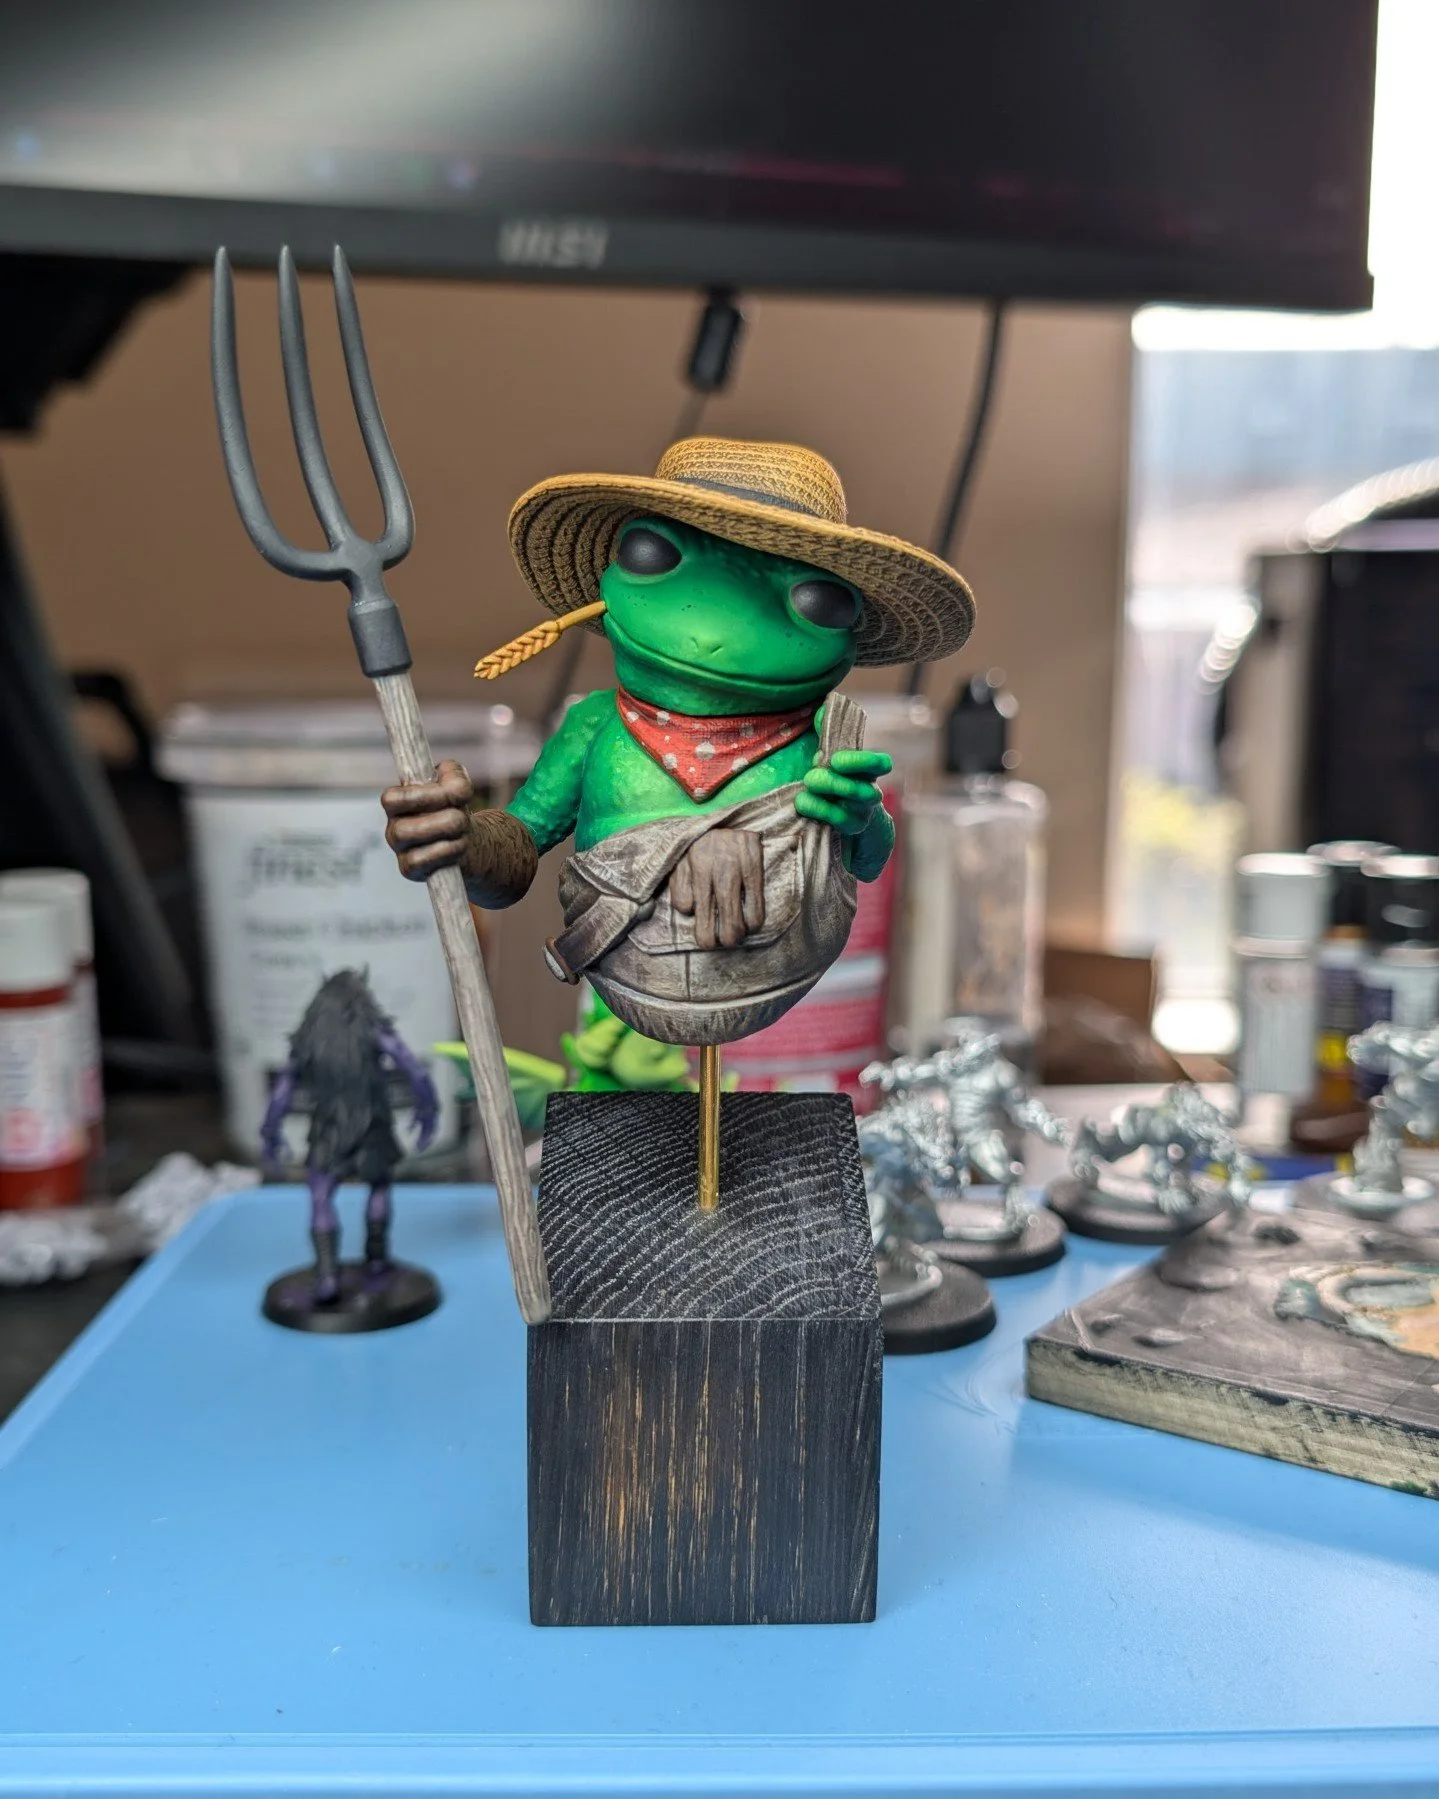
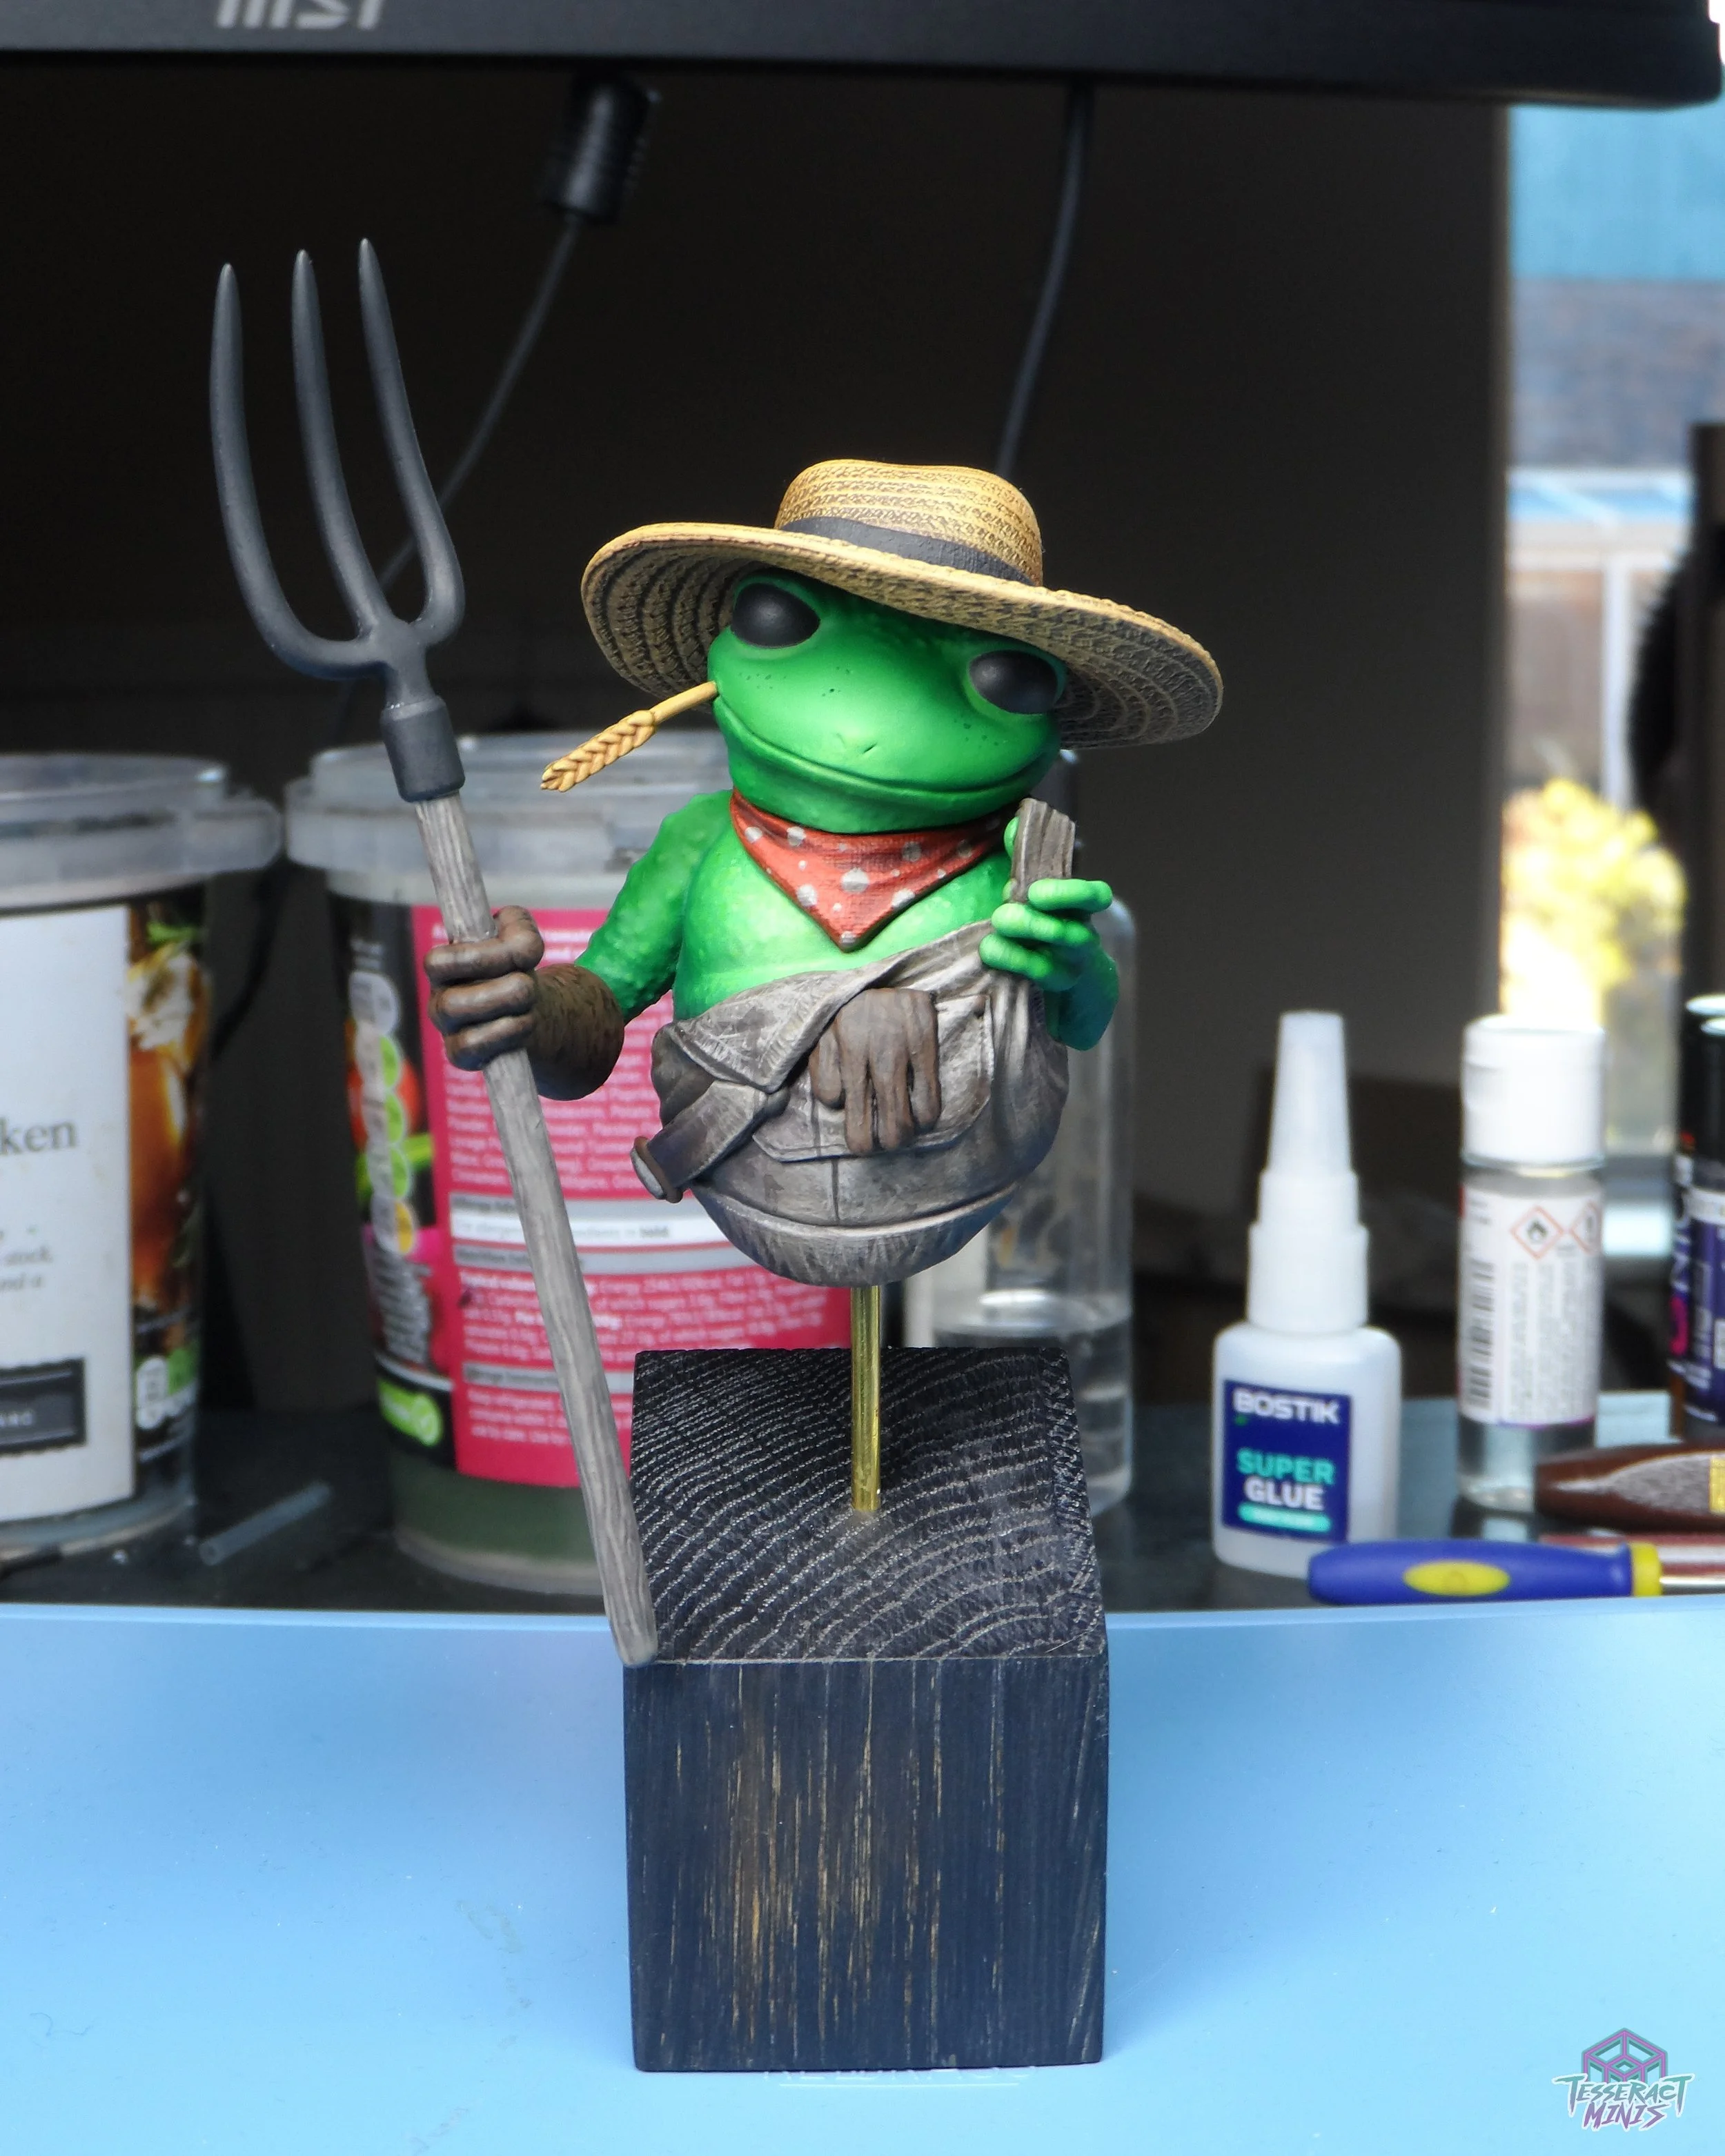
Fergus, Farmer Frog - Our brand new resin cast miniature!
Whenever I get in to a new hobby, the first few months become an absolute marathon of research, I consume knowledge with a voracity usually reserved for monsters in 4Chan horror stories, and this cycle has been no different with getting in to taking pictures, and working on improving my craft.
So, whilst I will be the first to hold my hand up and say I am new to photography, and very inexperienced, I have also frontloaded my experience with a lot of learning from folks FAR more knowledgeable than I…. and something I realised almost immediately is that our approach to photography in the miniature painting hobby is… well… kinda weird.
The first thing I need to address (and the main subject of this article) is the obsessive attitude we have towards gear…and look, I get it! We’re miniature painters… our hobby is very badgy and we really care about the gear we use, so of course that’s going to transfer in to our miniature photography.
The problem, as I see it… is that we’re divided in to two pretty strict schools and neither of them are actually making much sense, when I try to view their ideas from a “photographer’s” lens. There’s those damned fingie quotes again.
So, as I see it, there seems to be two schools of thought:
School A says “Your phone is more than capable of taking great mini pics and you don’t need a camera.”
School B says “You should invest in a decent quality setup for your mini pics, if you want to take great mini pics.”
Now these takes are purposefully a little reductive… there is a bit more nuance to the argument than that, and we’ll touch on some of it later… but fundamentally, I don’t actually believe that either of these schools is hitting the point.
There’s a saying in the photography world that is just as divisive, and is almost guaranteed to start a passionate discussion whenever someone says it online: “The best camera is the one you have available at the time.”
Now I really like this saying… I like that it challenges elitism in a world where practitioners can EASILY be carrying £15-20,000 worth of gear in their daily bag. Buuuuuut the central point is predacated on an artistic concept that’s somewhat unique to photography… the idea of “catching the moment”, and for us as miniature painters… we’re making the moment, we have complete control of it…so for our unique situation, it’s a bit of a cop out to say “this is all I have”.
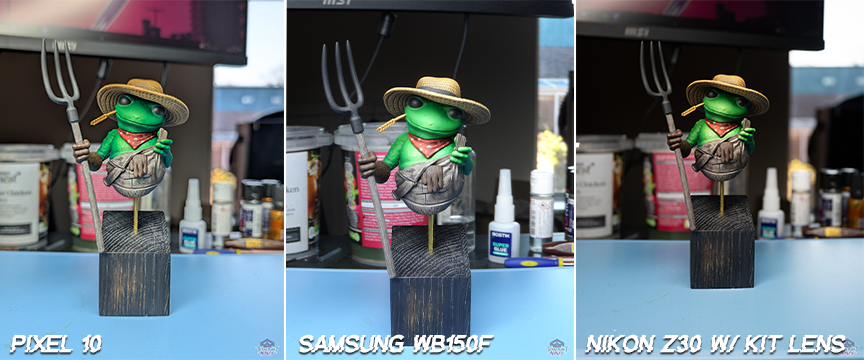
3 versions of the same photo of Fergus, taken with 3 different cameras.
Above are three “control” images if you will. Three pictures of Fergus, taken on 3 different cameras, in the same light, on the same backdrop and all handheld (as in no tripod). I want to talk you through these images, one by one. These are all dumped straight from the camera that took them - I’ve done nothing to them (except adding my watermark, obviously).
Firstly the phone pic, taken on my Pixel 10. The colours on this are actually fairly true to life overall, but as soon as you see it beside two pictures taken with a camera you can see a couple of issues immediately. Firstly, there’s a lot of automatic “averaging” going on… where the camera processor has applied some normalising to the skin, without my consent. This is the single biggest issue with phone cameras, and the reason I don’t believe you should let them anywhere near your mini pics, if obtaining great pics is your goal.
All of the desaturated lighter tones that I painstakingly worked in to the skin to keep it interesting have been completely pushed aside for an average green that lacks nuance and detail. There’s also a TON of artificial sharpening on the dungarees, with the textures that I’ve painted in looking FAR less subtle in this photo.
In the second pic, I’m using a Samsung compact digicam from 2012. This is what most of you would probably consider to be an old junk camera, and you’d likely never even think to shoot your minis with something like this. However… this is a marked improvement over the phone camera. Despite being less than a third of the resolution, and only having the option to shoot JPEG, this 14 year old camera gives a result that’s much easier to work with…and the crazy part is, I totally hamstringed it in this test.
Because the zoom on the phone cam is mostly digital, and because the lens quality on the “good camera” is so much higher, I shot this with the widest angle the camera has available. That means I got no background blur, and combined with the low resolution, also less readable detail than would have been possible if I’d zoomed in. Yet look at it! Sure the colour skews cold, but that’s a really easy fix. What’s more important is that it’s picked up on the subtleties in stroke weight, colour placement and complex variations that are the life’s blood of this paint job (even at this WIP stage). Colour correcting is the EASIEST part of editing… fixing over sharpness, or the complete loss of colour information (like in the phone pic) is next to impossible).
The third pic is my trusty Nikon Z30, with the 16-50 DX kit lens. This is about the cheapest lens for this camera that has some degree of flexibility to it, so I chose it again, to try to hamstring the camera a bit and give the phone a fair fight. It is still, quite clearly LEAGUES ahead, being a photo that is not only true on colour, but also true on detail, and beautifully expressive in how the light is rendered too.
However, this is also a £500-ish setup…and whilst in the photography world that’s peanuts… in the real world, that’s a HUGE investment when you already own a phone, that you’re constantly being told is good enough. So… lets explore this issue deeper. Let’s talk about editing and settings/setup.
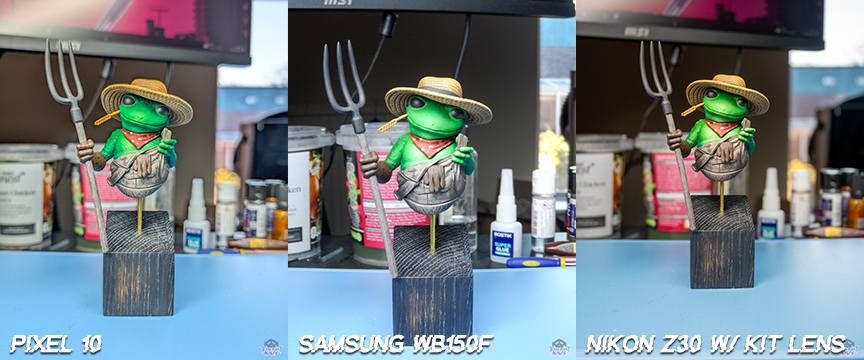
The same images as previous, but with an Auto Edit applied.
The first thing many of you may consider is a simple auto edit. All phones do this these days, and Lightroom (the most popular photo editing software) also has this function. Above we see the exact same images as previous, with the only difference being that I’ve hit the auto button in Lightroom.
We see here, not a ton of changes to the phone pic… some subtle tweaks to the lights and shadows, but due to all that colour information being stripped from the picture, by the phone’s processor, there’s nothing the editing software can do to bring back that information. We still have a mess of midrange skintones and oversharpened highlights.
Conversely, the changes to the middle and right pics are much more helpful. There’s a little more warmth added back to the middle pic, and still a much more true to life read of light and shadow. The Z30 pic continues to be the best one, holding on to it’s headstart, but again the only changes really needed here were a bit of light and shadow tweaking.
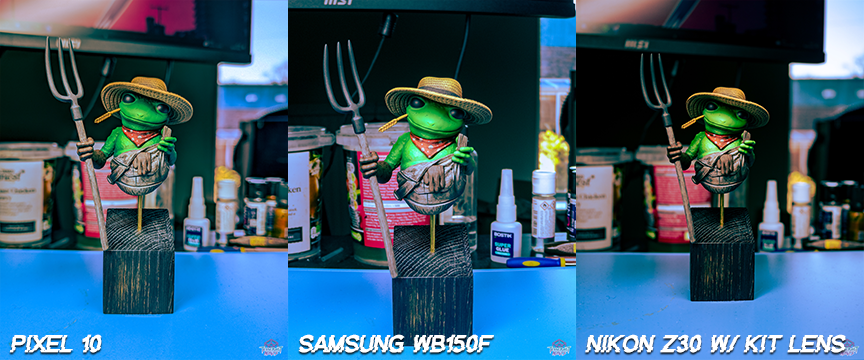
The same three images, this time with a stylistic edit.
This next bank of images is more of a cautionary tale about why you shouldn’t fuck with your mini pics too much… why your edits should be tasteful, considered and aiming for a true to life representation. Applying pre-made filters is almost always a bad idea… and here’s why.
What I’ve done here is apply one of my lightroom presets that I use for my general photography, to give it a warm film vibe. Essentially this preset (basically a custom filter I made myself in Lightroom) aims to boost warmth and contrast, and adds a little grain in to the image, to make it look more like it was shot on 35mm colour film. This should be a vibe that fits Fergus nicely.
Again, our phone pic here is a write off… with virtually no frontal highlighting, the tonal shifts just accentuate the problems that were already there. The preset did actually manage to find a tiny bit of separation in the skintones, bringing the chest forward a bit (thank god!) but other than that, the image is still essentially unuseable.
Our middle pic, which was doing so well, has also suffered. Whilst everything is now reading warmer and for the skin and hat in particular, this brings them closer to life…. the dungarees are just a mess now. This lazy method of chucking a filter on has created as many issues as its fixed.
Even our right hand photo, whilst still the best of the three, is struggling a little… the filter has found some red tones in the dungarees and leather, an decided to push them HARD. This pic is probably still “useable” just due to being overall such good quality, but it’s definitely not a realistic representation of the paintjob.
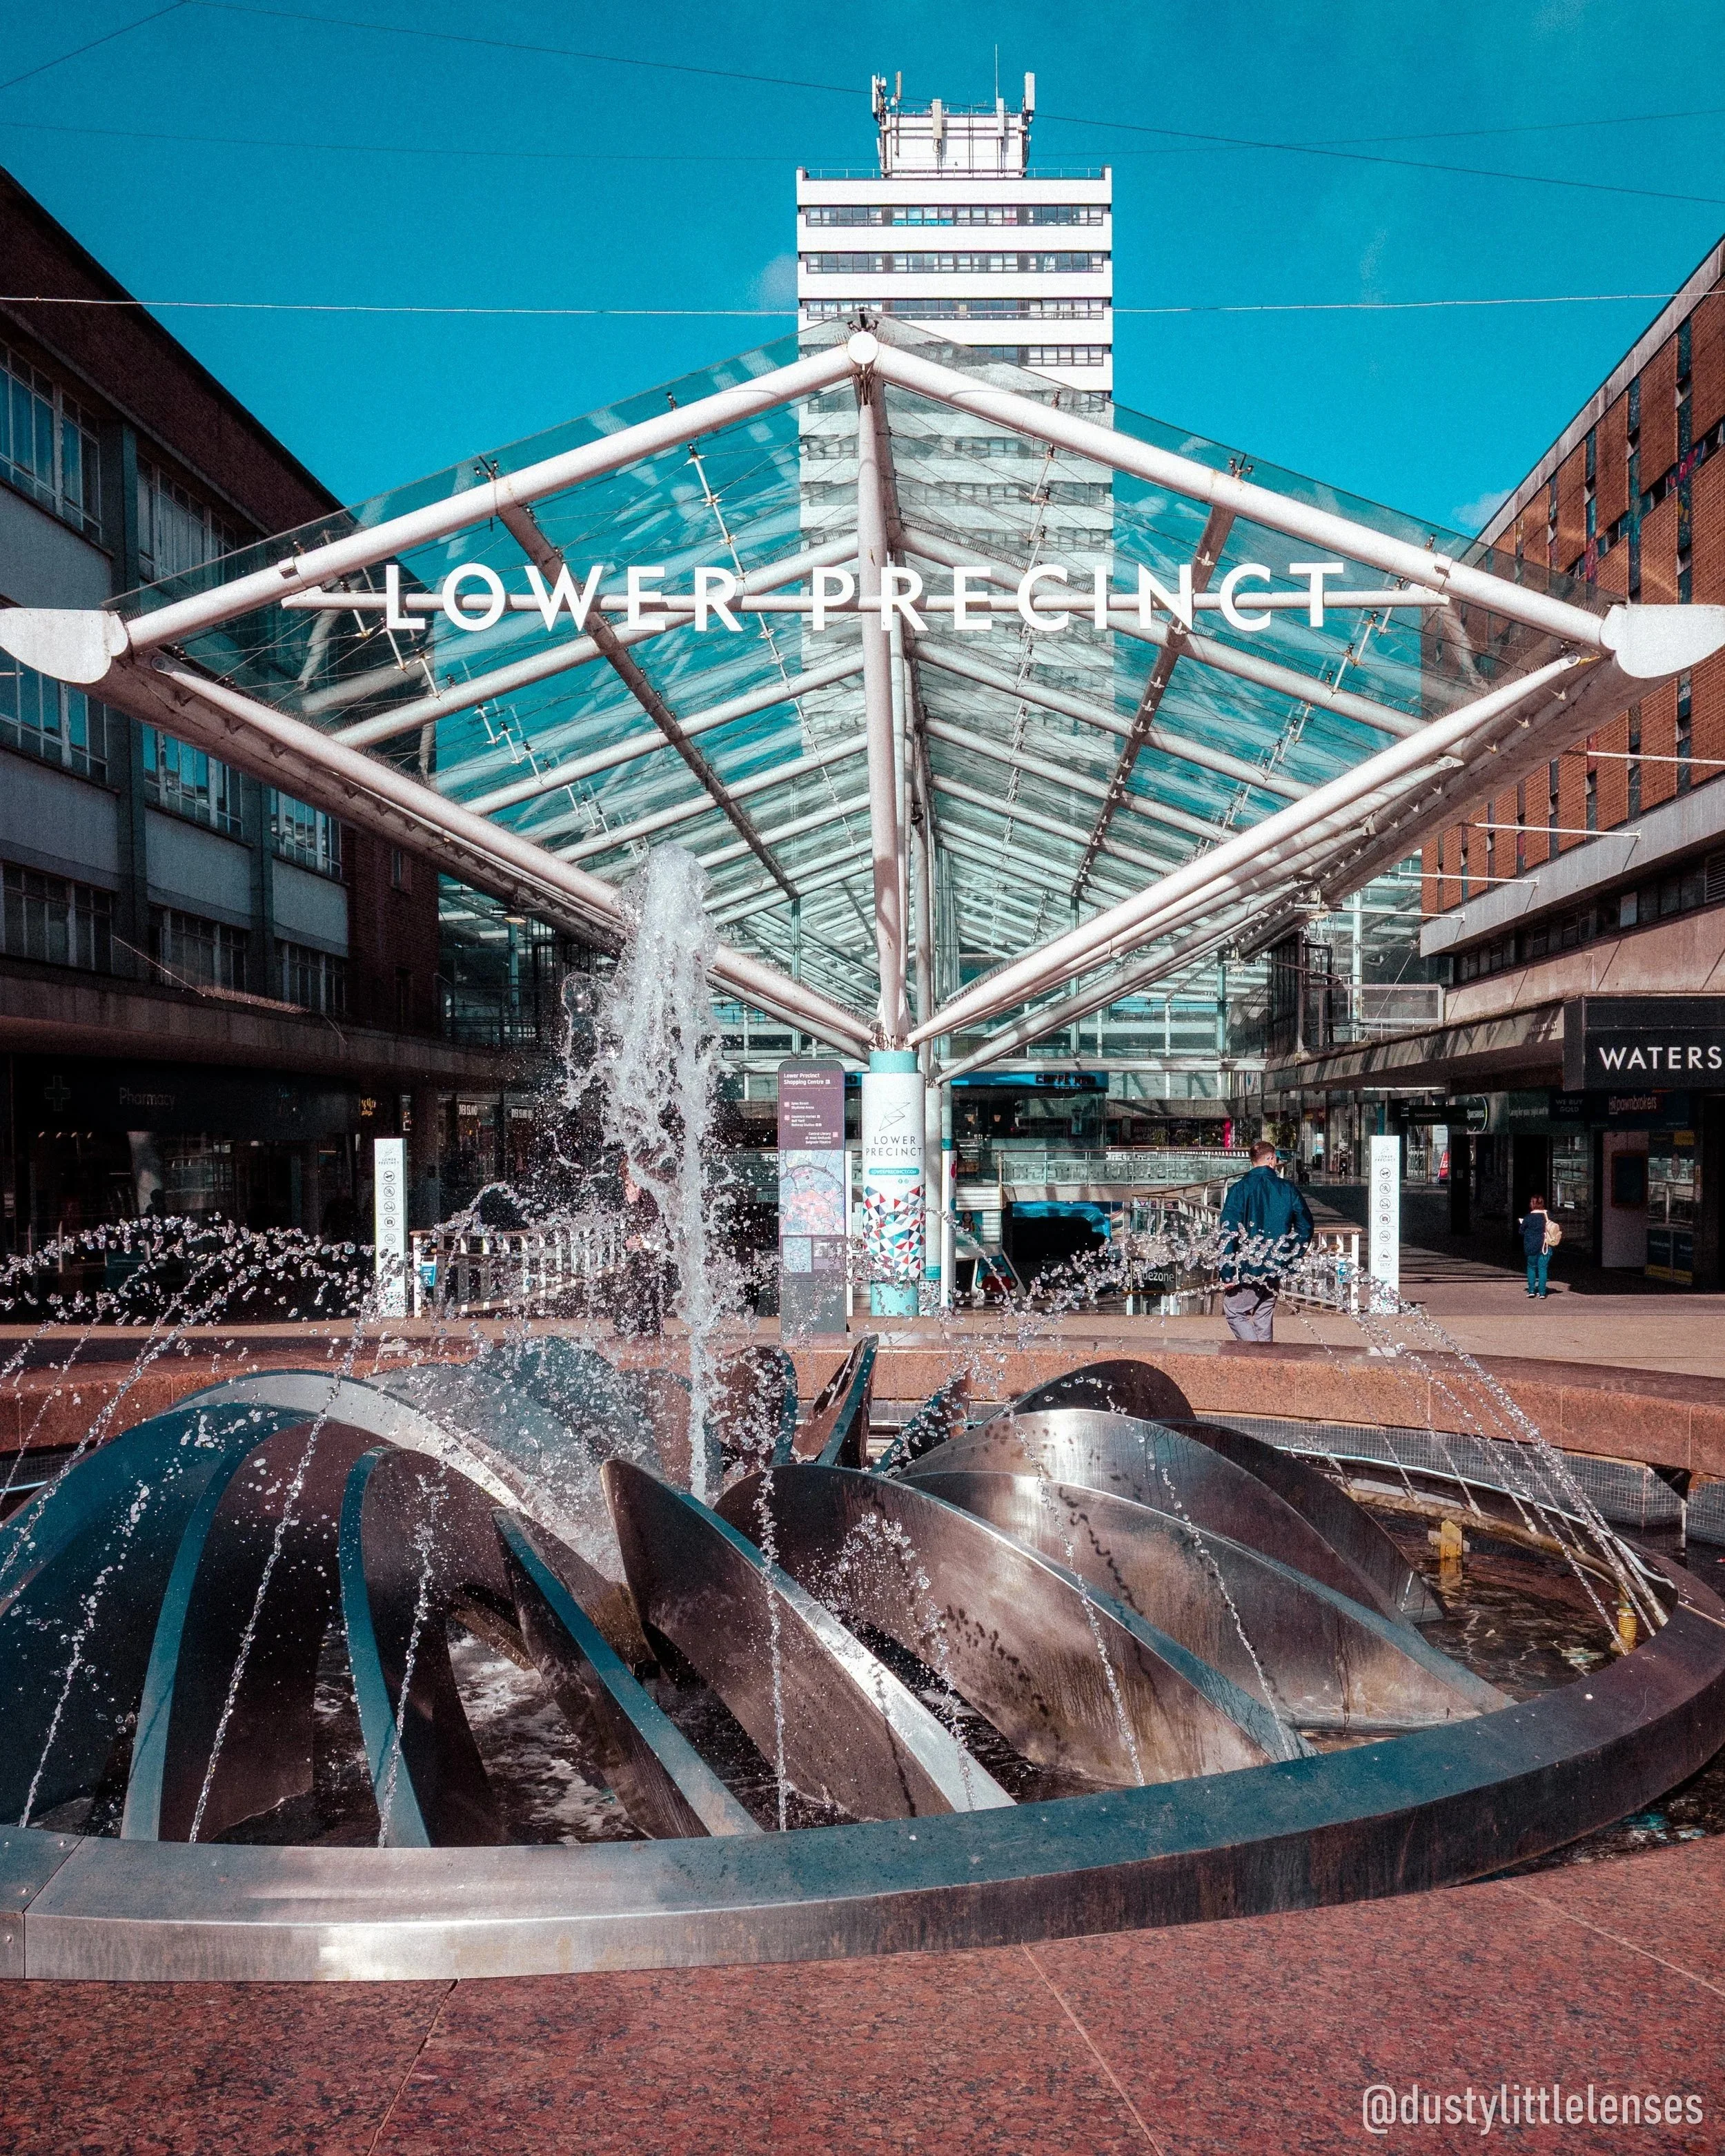
A fountain in central Coventry
Before we move on, I wanted to show you what this filter is SUPPOSED to look like when used on what I made it for. The important takeaway here is that filters aren’t bad… but the whole point of them is to express an artistic and stylised view of reality, which isn’t compatible with the pursuit of miniature painting photography, where we’re aiming to represent the actual real-life work we’ve done on the model.
So now I want to present one final bank of images of Fergus…

Custom edits of the Fergus pics.
In this final set, I’ve done my best to just get the pics looking nice and presentable… not necessarily true to reality per-se, but attractive as photos. I’ve custom edited each one in a manner that’s fairly Instagram friendly (this is not the first time Instagram is going to come up).
In the first photo, the dreaded phone pic… we STILL can’t do much with this… it’s really at this point we have to accept that the phone has broken the photo and we’re cooked.
The middle image now has some much needed warmth, it’s sharp and clear. The colour information isn’t perfect, but we’ve come a LOT closer to the colours I see when I look at the model on my desk, so I’m happier for sure.
The final pic, I think I actually got a little greedy and added a touch TOO much warmth back in, but due to the amazing clarity and light rendering, it’s still the best of the three.
So…. after all that… what’s the actual answer?
Well, first of all it ISN’T to throw away your phone. There ARE things you can do to get BETTER pictures from a mobile phone…mainly, if your phone lets you, shooting in RAW instead of JPEG mode.
This essentially just records the raw data from the camera sensor, rather than putting it through any kind of processing and it fixes a LOT of the issues with phone pics. Whilst they still won’t be as good as a dedicated camera, the added information from a RAW image will give you a ton more editability to your images, and allow you to correct a lot of issues.
Here’s a RAW from my phone, to show you:
RAW Image from Pixel 10.
As you can see, it’s still pretty flat - the truth is that phone sensors have to be so tiny to fit inside phones that they just struggle to capture colour subtlety… but that said, it is doing a MARKEDLY better job, than it was in JPEG mode, and I’d be willing to bet I could wrangle this into an image that at least didn’t look like it was taken on a phone. It is also, however, suffering from a TON of chromatic aberration and “doubling” in the background, which makes the out of focus parts unbelievably ugly.
So… what I now wanna do, is show you the big, full size version of the image from that cheapo compact digicam… because that’s where I think my point is REALLY going to hit home.
Cheapo cam pic, totally unedited.
My phone has a 50 megapixel modern CMOS sensor… this cheapo camera has a 14.2 megapixel old skool CCD censor. Just take a few seconds to scroll between those two images and study them.
YES, there’s spherical distortion in the cheapo cam pic (where the image looks slightly bent as if wrapped around a ball), presenting in the background… but look at just how much better it is at finding the colour subtleties in the face and the dungarees. How well it actually renders the softness i’ve taken the time to work in to the paint job.
Yes, we need to push some contrast in to it and warm it up a bit, but the basic image is SO much nicer. The hilarious part is not only is this shot in a super low resolution, but it’s also in JPEG format, so again, this whole time, I’ve been fighting against a lack of data with this image.
For me, I think the point of all of this is that it helps me understand that a camera, even an old, low spec one, that’s made for the specific purpose of taking photos, will always do a better job than a camera that is part of a feature list of a device that wants to do many things.
The other point I think it brings home is that… we post most of this stuff on Instagram, Facebook and maybe X (or one of its clones)? These are all social platforms that compress the dick off your images… resolution is virtually meaningless to the goal of getting a photo to look nice on Insta.
So the important part, after all the bad science… what’s my actual advice? What do I think you should do?
Firstly if you have no budget for photography and can only use your phone, keep using it, just switch it to RAW if that mode is available and edit your RAWs to look as close to reality as you can… and for the love of god, PLEASE stop bottoming out the exposure slider on your pics. I know it looks all moody and edgy, but I literally can’t see your paint job, and I really want to! I love art, all art that is made by humans, it’s precious… please don’t hide it in darkness.
Next… look on ebay at cheap cameras! You’d be AMAZED how affordable older stuff is, whilst still being VERY capable. The WB150F from Samsung sells at £60 on ebay. I got mine for £30 at a carboot sale! DSLRs from a similar time period do a BRILLIANT job and can be had for a little over £100 with a lens. The Nikon D3100 and 3200 are both fantastically capable cameras, and routinely sell at around the £100 mark (with lens for the 3100, body only for the 3200) if you’re patient and set alerts up.
Anything that shoots more than 10 mpx on a full frame sensor, or maybe 12-16 mpx on a smaller sensor (such as DX, APS-C, Micro Four Thirds etc) is going to be able to pump out Instagram worthy pics… you do not need the latest Sony or Fuji £5000 camera to make good content.
By the way, I know there’s a few buzzy sounding camera nerd words in this article… I trust your ability to google them if you don’t know what they mean, and I don’t want to bloat an already long article with explanations, so I apologise if it causes any head-scratching.
Finally - pay attention to your overall setup, but don’t gild the lily. Your painting light is a great photography light, and no matter how much you might be told so, you don’t NEED a backdrop.
As you’ll have seen from some of the pictures in this article, once you know how to use your camera, you can create lovely, natural background blurs (even the Samsung could do this, I just wasn’t using it at the settings to enable it to), that look artistic and frame your subject wonderfully. Backdrops are nice for a “product photography” style, if that’s the look you want…hell it’s often exactly the look I want… it’s just not a necessity to taking a good picture.
The blue of my palette certainly introduced a challenge to these photos (deliberately, I like to demonstrate with worst case scenarios) and the bounced cold light from this is the reason that the older sensor in the Samsung cooled the pic off so much I think… so yeah, obviously create a nice neutral scene for your mini to sit in… just don’t feel like you have to throw cash and space at the problem.
Get a tripod! Even a cheap one… if your lighting isn’t very good, your camera is going to slow down the shutter speed to let more light in, this is going to result in more shakiness showing in your photos. By using a tripod and shooting in a timed mode, you can circumvent this. A tripod can be found at your local carboot (trust me, I see them EVERY time I go) for a couple of quid. Hell if you buy new on Amazon you can find them for under £20. Tripods are cheap and effective and will make for crisper photos (again, I shot the example pics in this article handheld, to try to show off this problem).
DON’T feel obliged to shoot fully manual (or in your phone’s PRO mode)… it’s a trap. Yes, you get far more control over the shot… but you don’t need control, you need consistency. You need to be able to set up to shoot and get something Instagram worthy without spending all day on it, messing around with settings.
If you don’t have a tripod, shoot in shutter priority and set a fast shutter speed. If the image is too dark the camera will either use ISO to bring it up, or it’ll lower the F-stop on your lens (making the hole bigger). You can also use editing to help. All of these things have knock on effects to your pics, but we’re just trying to get you off the starting line here. You can figure out the finer details as you go.
If you DO have a tripod, shoot in aperture priority and lower the F-stop as much as possible, whilst getting a bright enough image. This will help give you that sexy blurred background.
If you have a phone that lets you manually select which lens to shoot with from its cluster, choose the telephoto lens over the wide angle lens (this’ll be the one with the bigger mm number, or larger focal length in camera speak). This lens will usually be better at subject separation (keeping the subject clear from the background) and will give you a tighter composition that makes the mini look more like the centre of attention.
And last of all… take fucking loads of photos! Play with angles, play with lighting intensities and directions, play with different things to stand your models on, in and around. Figure out what you like, what gives the image of your mini that is true to your vision and execution of it.
Photography is mad fun, really rewarding and an excellent way for you to learn about natural behaviours in colour, light and shadow. It’s a brilliant tool to help you improve your painting and share your inspiration with people.
Use it!
If you’ve read this article and slowly been subliminally conditioned to want to buy Fergus, as I mentioned at the start he IS our first ever cast miniature and I do REALLY want to make a success of him.
We’re offering a pre-order price at the moment of £30 for him, which is a £7.50 saving over what he’ll cost at general retail. In addition, the first 50 copies will include a serialised thank you card, so you know that you were one of the first in the world to own a copy. He’s already selling pretty fast, but it would truly mean the world if you wanted to join me in this celebration of becoming a “real” miniature maker, after so many years of loving miniatures!
Navigate yourself to our shop section to grab one.
Thanks gang,
Stu